Sign In | Join Free | My himfr.com
Home > Coating Thickness Gauge >

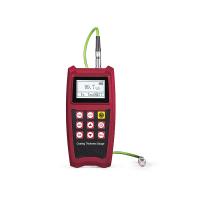
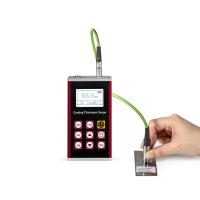
High Stability NFe Paint Coating Thickness Gauge Build In Thermal Printer

    Buy cheap High Stability NFe Paint Coating Thickness Gauge Build In Thermal Printer from wholesalers
     
    Buy cheap High Stability NFe Paint Coating Thickness Gauge Build In Thermal Printer from wholesalers
    • Buy cheap High Stability NFe Paint Coating Thickness Gauge Build In Thermal Printer from wholesalers

    High Stability NFe Paint Coating Thickness Gauge Build In Thermal Printer

    Ask Lasest Price
    Brand Name : LEEB
    Model Number : Leeb242
    Certification : CE, FCC EAC & ISO Certification
    Price : Based on quantity
    Payment Terms : T/T, PayPal, Western Union, L/C
    Supply Ability : 500 sets per month
    Delivery Time : In 7-10 work days
    • Product Details
    • Company Profile

    High Stability NFe Paint Coating Thickness Gauge Build In Thermal Printer

    High Stability NFe Paint Coating Thickness Gauge Build In Thermal Printer


    High Stability And Build-In Thermal Printer Rechargeable Li-Ion Battery Paint Coating Thickness Gauge


    Features & Functions


    ● High stability and precision

    ● Software for PC connection and data transmission, analysis, and priting measurement reports.
    ● Rechargeable Li-ion battery, available for 10 hours working continuously
    ● With built-in thermal printer(Width of printer paper: 56.5±0.5mm).


    Technical Parameters


    Technical Parameters
    ModelLeeb242
    Measuring principleMagnetic induction (Fe ) & Eddy current ( NFe)
    Measuring range (µm)0~1250μm
    Accuracy±(1~2%H+1) μm; H refers to the thickness of testing piece
    Minimum resolution (µm)0.1μm
    Min curvature of the min area (mm)Convex1.5 Concave9
    Diameter of the min area (mm)Φ7
    Critical thickness of substrate (mm)0.5
    Operating temperature0℃~40℃
    Memory500 groups measured data
    Dimensions230*86*46mm
    Weight400g
    PrinterBuild-in High-speed Thermal Printer
    Power supplyRechargeable Li-ion battery
    Standard ConfigurationMain Machine,Fe or NFe probe & substrate, Calibration specimens*5, Paper for Printer, Charger,
    Optional AccessoriesProbes, Specimens, Paper for printer
    Measuring Principle
    1) Magnetic method (With Fe Probe)
    Measuring Non-magnetic coatings on magnetic substrates (such as aluminum, chromium, copper, rubber coatings on steel, iron, alloy and hard magnetic steel substrates).
    When the probe contact with cover, measuring probe and magnetic metal matrix form a closed magnetic circuit, as a result of the existence of
    2) Eddy current method (With NFe Probe)
    Measuring Non-conductive coatings on Non-magnetic basis metals (such as enamel, plastic, rubber, paint coatings on copper, aluminum, zinc, tin substrates).
    SUMMARY
    The instrument is a portable Non-destructive testing instrument. It can quickly, accurately measure the thickness of the coating with no damage. By using different measuring probes, it can meet the needs of a variety of measurement. The instrument is widely used in manufacturing, metal processing industry, chemical industry, commodities inspection, and other areas.
    The instrument carried the following standards:
    1, GB/T 4956─2003 Non-magnetic coatings on magnetic substrates- Measurement of coating thickness- Magnetic method
    2, GB/T 4957─2003 Non-conductive coatings on Non-magnetic basis metals- Measurement of coating thickness- Eddy current
    3, JJG 889─95 Magnetic Resistance Thickness Gauge
    4, JJG 818─2005 Magnetic and Eddy Current Measuring Instrument for Coating Thickness
    Characteristics
    1, Using both the magnetic and eddy current method,can measure the thickness of the magnetic non-magnetic coating on metal substrates and measurable non-magnetic thickness of the conductive coating on metal substrates.
    2, Two measurement methods: Single measurement / Continuous measurement
    3, Two work methods:Direct / Group
    4, Five statistics: Average, maximum and minimum values, test times, the standard deviation;
    5, Single point calibration can be used two methods of calibration and two points for calibration instrument,basic calibration method and can be used to modify the system error of measuring probe.
    6, Storage functions: Can store 2580 measurements in total;
    7, Delete function: To delete a single suspicious data in measurement,Also can delete all the data, so that new measurement
    8, Limit set: Instrument can automatically alarm to the measured value beyond the limit;
    9, Under voltage instruction;
    10, Operation process have hum tips;
    11, Error prompt,screen display or hum errors;
    12, Two ways to shutdown mode: Manual shutdown mode and automatic shutdown mode;
    13, Can be connected by installing the software and computer.It can be finished through computer operation data download after connection,Storage, printing, etc, fast and convenient.

    5 calibration specimens: 48.5μm,99.8μm,249μm,513μm,1024μm


    High Stability NFe Paint Coating Thickness Gauge Build In Thermal Printer


    High quality Equipment Box:


    High Stability NFe Paint Coating Thickness Gauge Build In Thermal Printer


    Quality High Stability NFe Paint Coating Thickness Gauge Build In Thermal Printer for sale
    Inquiry Cart 0
    Send your message to this supplier
     
    *From:
    *To: Chongqing Leeb Instrument Co.,Ltd
    *Subject:
    *Message:
    Characters Remaining: (0/3000)